IVR - Auto Attendant
Overview
The IVR module allows you to create one or more IVRs ("Interactive Voice Response" systems or Auto Attendants). You can then route calls to the IVR and play a recording prompting callers what options to enter, such as “press 1 for sales and press 2 for the company directory.” An IVR can also route calls to another IVR, or in other words, a sub-menu. As a general rule, you never want more than five or six options in a single IVR, or it will become too confusing to navigate. It is better to only include a few options at a single menu level, and route callers to a sub-menu for more choices.
Logging In
- From the top menu click Applications
- From the drop down click IVR
Creating a new IVRs
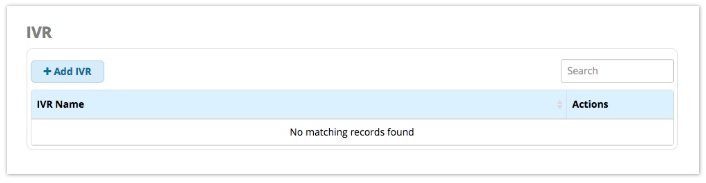
To add an IVR, click the Add IVR button.
Fill out the form as described below.
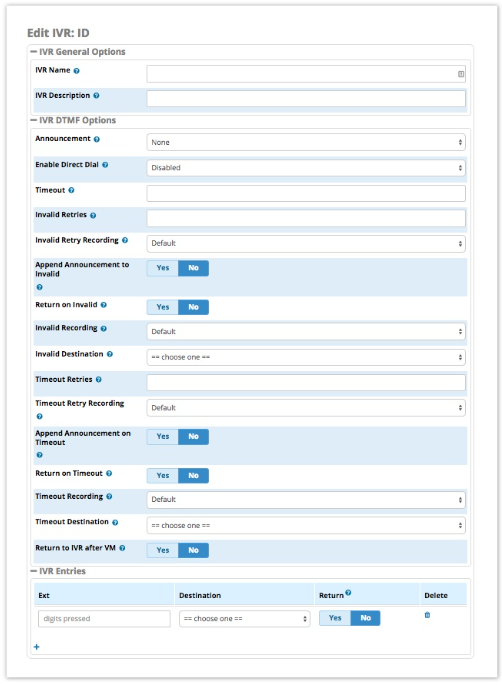
IVR General Options
IVR Name
Enter a name for this IVR.
IVR Description
Optional: Enter a description for the IVR to help you remember what it is for.
IVR DTMF Options
Announcement
Here we choose which recording to be played to the caller when they enter the IVR. This can be any system recording that you have defined in the System Recording module. It will usually give them instructions, such as “press 1 for sales and 9 for support.”
Enable Direct Dial
Do you want to allow callers to be able to enter a user’s extension number when navigating the IVR to go directly to that user’s extension? Your options are:
- Disabled - This will not allow any caller to direct dial any extensions on the system. Callers will be restricted to dialling only the IVR entries that you define.
- Extensions - This will allow a caller to dial any system extension directly from the IVR, regardless of what entries you define in the IVR.
- Directory Names (if a directory exists) - You will get a list of all company directories on your PBX, and you can restrict direct dialling to users who are a part of the company directory. This is a way to restrict which extensions a caller can direct dial from an IVR. To set up a directory, visit the Directory module.
Timeout
Enter the amount of time (in seconds) the system should wait for the caller to enter an option on their phone keypad. If this amount of time passes without the caller entering anything, it will be considered a timeout. After a timeout, the system follows the timeout rules defined below. We recommend setting this to 4 or 5 seconds.
Invalid Retries
How many times a caller is allowed to enter an option without finding a match before we send the caller to the Invalid Destination as defined below. We recommend setting this to 2.
Invalid Retry Recording
The prompt to play to the caller when they enter an invalid entry. This can be any system recording from the System Recordings module.
Append Announcement to Invalid
Yes/No: Controls whether a caller who makes an invalid entry will hear the main IVR announcement again. If set to yes, the system will replay the main IVR announcement after playing the invalid retry recording.
Return on Invalid
Yes/No: Controls whether a caller who makes an invalid entry in a "sub-menu" IVR will be returned to the parent IVR. Only applicable if the current IVR was a destination in another ("parent") IVR. If set to yes, the caller will return to the parent IVR after an invalid entry. The return path will be to the IVR that was in the call path prior to this IVR, which could lead to strange results if there was another IVR in the call path not immediately before this one.
If set to no, the caller will be taken to the "invalid destination" set below after an invalid entry.
Invalid Recording
The recording to play to the caller after they have reached the invalid retry count defined above. This can be any system recording from the System Recordings module.
Invalid Destination
If callers cannot find a match after reaching the number of invalid retries defined above, they will be transferred to the invalid destination you set here. This can be any destination on your PBX.
Timeout Retries
How many times callers are allowed to timeout without pressing any options on their keypad before they are sent to the invalid destination defined above. We recommend setting this to 1.
Timeout Retry Recording
The recording to play to a caller who times out. This can be any system recording from the System Recordings module.
Append Announcement on Timeout
Yes/No: Controls whether a caller who times out will hear the main IVR announcement again. If set to yes, the system will replay the main IVR announcement after playing the timeout retry recording.
Return on Timeout
Yes/No: Controls whether a caller who times out in a "sub-menu" IVR will be returned to the parent IVR. Only applicable if the current IVR was a destination in another ("parent") IVR. If set to yes, the caller will return to the parent IVR after a timeout. The return path will be to the IVR that was in the call path prior to this IVR, which could lead to strange results if there was another IVR in the call path not immediately before this one.
If set to no, the caller will be taken to the "timeout destination" set below after timing out.
Timeout Recording
The recording to play to a caller when they have used the number of timeout retries defined above. This can be any system recording that you defined in the System Recording module.
Timeout Destination
If callers do not make an entry within the maximum number of timeout retries defined above, they will be transferred to the timeout destination. This can be any destination on your PBX.
Return to IVR after VM
Yes/No: Whether to offer callers who end up in a user’s voicemail box the option to return to the IVR. If set to yes, callers who reach a voicemail box from an IVR will be prompted to leave a voicemail and to press 9 to return to the main menu, which will return them back to this IVR.
IVR Entries
This is where you define options for callers. Press the blue plus sign to add additional entries.
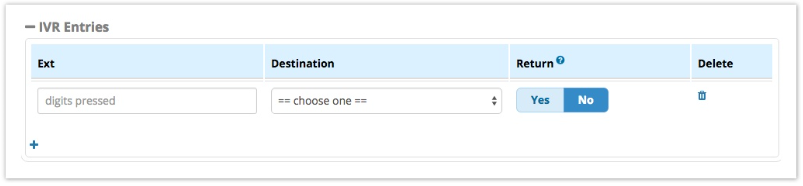
Ext
The digits the caller should press to reach the destination. We recommend using only single-digit entries to keep it simple for your users.
Destination
The destination to route the caller to when they press the digits in the Ext field. This can be any destination on your PBX, such as ring groups, time conditions, queues or anything else.
Return
Yes/No: Whether to send callers back to the parent IVR when they press the digits in the Ext field. For example, this is handy for things such as, "To return to the previous menu, press 9."
You can add hidden options for things like remote voicemail access for your employees. "Hidden" means the option exists but you don’t provide verbal instructions for it in your announcement to callers. Note: the caller could still "guess" the option, so be sure to use difficult-to-guess options and/or use password protection if security is an important consideration.
For example, you could create an Ext entry of "98." For the destination, you could choose “Feature Code Admin” and "Dial Voicemail <*98>" to dial voicemail. Do not prompt the caller with this option in your announcement. Inform your users that in the main IVR, they can dial 98 to access their voicemail. They will then be prompted to enter the extension number and the voicemail password.