Distinctive & Priority Ringing
Distinctive & Priority Ringing
Description
Allows you to make your phone ring with a different ring cadence. Use this service if you want to know when a specific person calls such as your manager or spouse or when you would like to easily tell when a call is from inside your group or outside your group.
Function
The criteria for each Priority Alert entry can be a list of up to 12 phone numbers or digit patterns, a specified time schedule, and a specified holiday schedule. All criteria for an entry must be true for the phone to ring with a different tone (phone number and day of week and time of day).
The change in ring on the phone is only a change in the ringing cadence it does not change the ringing tone applied.
Some Handsets support the use of different ring tones based on the Calling Line ID. This is a phone feature and not a feature of the WHC service.
Configuration/Operation
Configuration is in the Employee section of the Business Portal and requires that a Time schedule has been pre-configured.
Please refer to the section on Time Schedules in the Site Features Guide.
In the Business Portal, navigate to:
- Employees > Features > Call Control
- Scroll Down to Distinctive & Priority Ringing
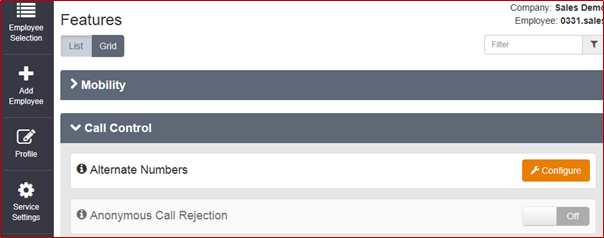
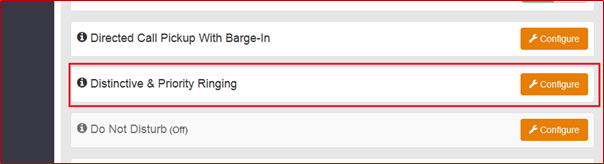
- Select Configure

- To add a new ‘Rule click the ‘+ Add’ button
- To Edit an Existing ‘Rule’ select the description of the rule.
- To Activate/Deactivate a ‘Rule’ use the slide button under the status field
- To Delete a ‘Rule’ select the left hand tick box and click the ‘x Delete’ button
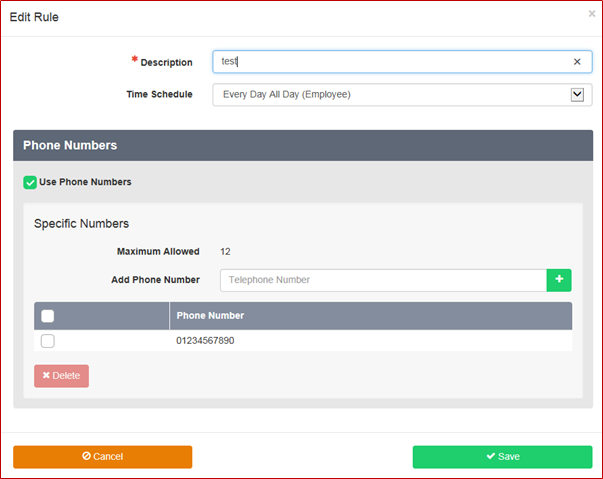
When adding a new ‘Rule’
- Type a description on the rule in the box provided.
- Select a time schedule from the dropdown box.
- Time schedule must be pre-configured for the customer’s site.
- When adding a new ‘Rule’ or editing an existing one.
- To add a new phone number enter the details in the box provided and Click the button
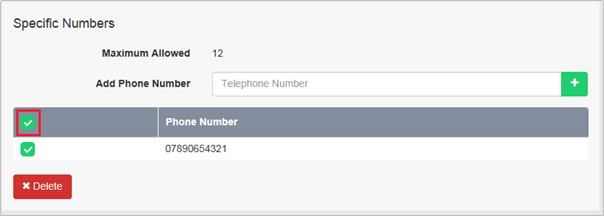
- To delete a phone number select the number using the right hand side tick box and click the ‘x Delete’ button
- To delete all numbers select the tick box in the header bar and then click the ‘x Delete’ button
See Below
- When all changes have been completed click ’Save’