Extensions - SIP
Overview
On IC-talk HC Chan_SIP is the preferred option for an extension please DO NOT use PJSIP or other options unless specifically instructed to do so for a specific item. The default port number will be 5160 for Chan_SIP.
This guide walks you through information related to SIP extensions.
Logging in
- From the top menu click Modules / Applications
- From the drop down click Extensions
Adding a SIP Extension
There are multiple ways to add an extension but we shall show a quick method and the full comprehensive options;
Quick Create Extensions
- From the Extensions landing page click on the Quick Create Extension button.
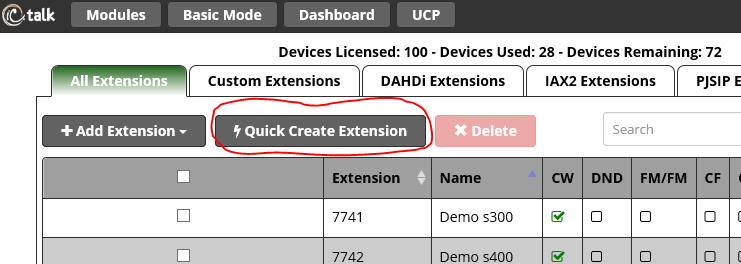
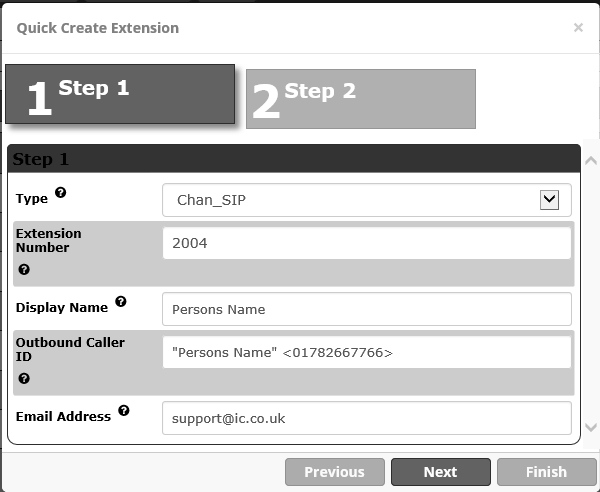
- A pop up window will appear complete this with the desired details using the format shown below for full explanations of each item requested see further below in full extension configuration
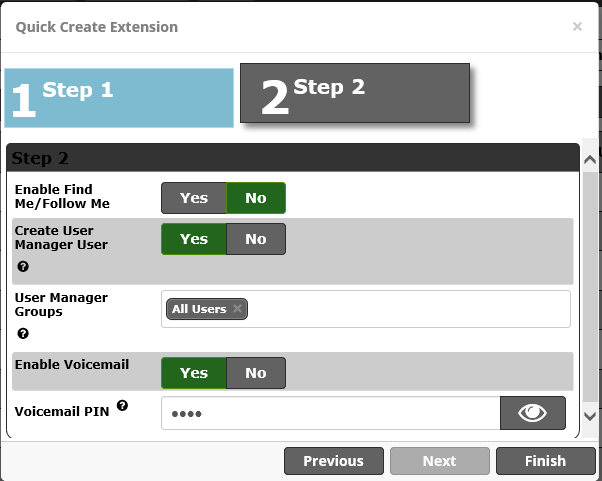
On pressing finish the user will be created and the password for the user will be emailed out tot he email address for the user that has been specified. If using an IC-talk HC or Sangoma handset simply plug in and once booted select Login Ext on the screen, enter your extension number followed by the PIN number entered in the quick setup and your device will connect to your system.
Adding an Extension in full user mode
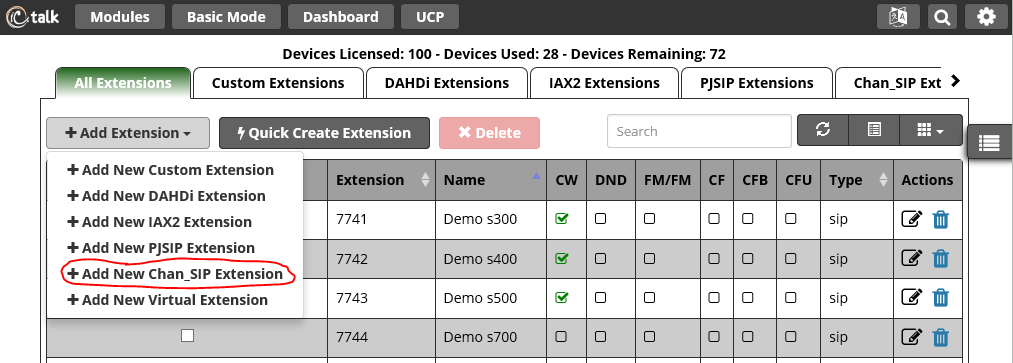
- From the Extensions landing page click on the Add New Chan_SIP Extension button.
General
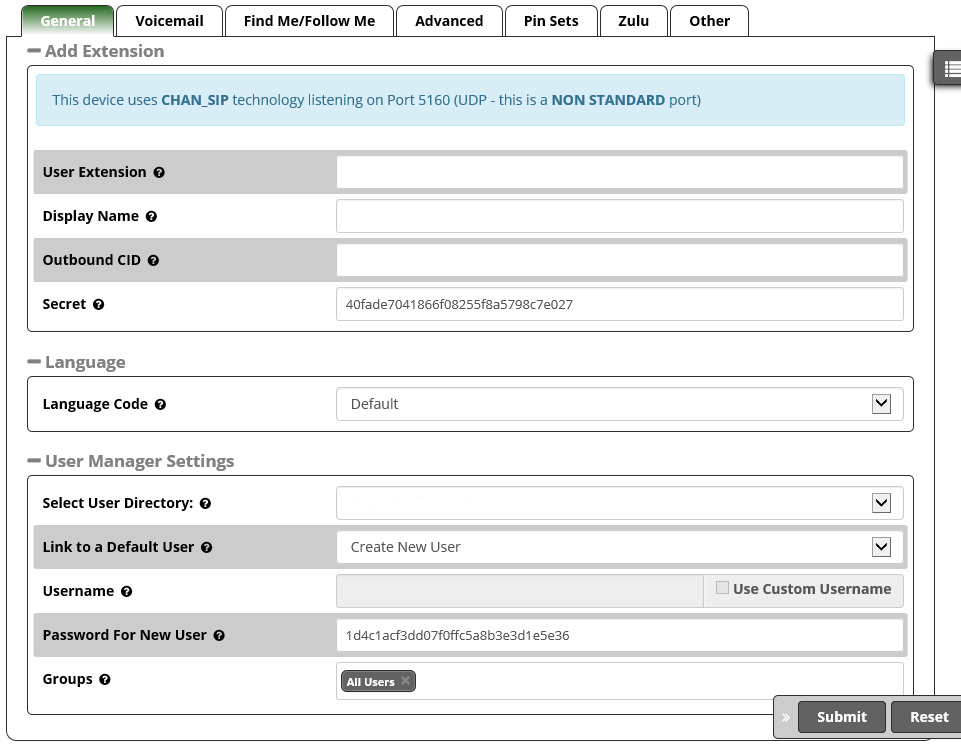
Add Extension
User Extension
This will be the extension number associated with this user and cannot be changed once saved. We recommend using 3- or 4-digit extension numbers.
Display Name
This is the name associated with this extension and can be edited any time. This will become the Caller ID Name. Only enter the name, NOT the number.
Outbound CID
Overrides the CallerID when dialing out a trunk. Any setting here will override the common outbound CallerID set in the Trunks module. Format: "caller name" <#######>
Leave this field blank to disable the outbound CallerID feature for this user. If you leave it blank, the system will use the route or trunk Caller ID, if set.
Secret
Password (secret) configured for the device. Should be alphanumeric with at least 2 letters and numbers to keep secure. A secret is auto-generated but you may edit it. A color-coded bar will display the strength of the secret, ranging from "really weak" to "strong."
User Manager Settings
Link to a Default User
Select a user that this extension should be linked to in the User Management module. Default = Create New User. An extension may only be linked to one user, and a user may only be linked to one extension.
-
- Create New User: Creates a new user in User Manager that will be linked to this extension.
- None: The extension will not be associated with a user in User Manager
- Existing User: If you have any existing users in User Manager who are not already linked to an extension, you can select one here in order to link the user to this extension.
Username
If Create New User is selected above, this will be the new user’s login username. If you leave the Username field is blank (grayed-out), the username will be the same as the extension number. To customize the username, check the Use Custom Username box and enter a username.
Password for New User
If Create New User is selected above, this will be the auto-generated user’s new password. A password is automatically generated, but you can edit it here.
Groups
If Create New User is selected above, or if you are linking this extension to an existing user, you can add the user to one or more groups. Groups are defined in the User Management module, so if you haven’t created any groups, none will show up here. To add this user to a group, click inside the field, and available groups will show up in a menu. You can start typing to quickly find a group. Click on a group name to add it to the field. Repeat the process if you with to enter multiple groups.
Voicemail
- Click on the Voicemail tab.
- If you wish to enable voicemail, click the Yes button next to Enabled in order to allow editing the options below.
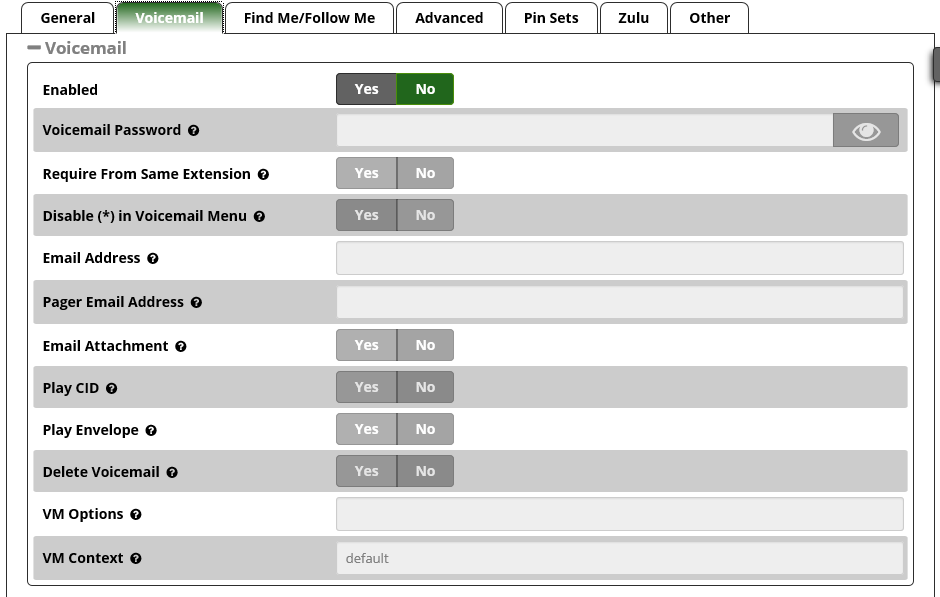
Voicemail
Enabled
Yes/No: Whether to enable voicemail for the user.
Voicemail Password
Enter the password (numbers only) the user will use to access the voicemail system. If left blank, it will default to the extension number. The user can change the password after logging into the voicemail system (*98) with a phone.
Require From Same Extension
Yes/No: Whether to require the user to enter their password after they reach the voicemail system from their own extension, by dialing *97. This option does not apply to *98 calls, which will always prompt for a password. For security purposes, a Yes setting is recommended in an environment where other users will have physical access to this extension.
Yes/No: Whether to disable access to the voicemail menu. Default = Yes. If set to Yes, a user will not be able to access the voicemail menu by pressing "*". If you have no plans to access your mailbox remotely, set this to Yes. If set to No, the user can access voicemail remotely by calling into their extension and pressing "*" to reach the menu.
Email Address
Optional - The e-mail that voicemail notifications will be sent to. Further down the page, you have the option of whether to attach the actual voicemail message to the e-mail.
Pager Email Address
Optional - A pager e-mail address or mobile email address that short voicemail notifications will be sent to.
Email Attachment
Yes/No: Whether to attach the voicemail to the e-mail notification. Requires an email address to be set above.
Play CID
Yes/No: Whether to read back the caller’s telephone number prior to playing the voicemail, just after announcing the date and time the message was left.
Play Envelope
Yes/No: Whether the system will play the message envelope information (date/time) before playing the voicemail message. This setting does not affect the operation of the envelope option in the advanced voicemail menu.
Delete Voicemail
Yes/No: Whether to delete the voicemail message from the mailbox after it is e-mailed to the user. If set to Yes, this would provide functionality that allows users to receive their voicemail via e-mail alone, rather than needing to retrieve it from the web interface or a telephone.
VM Settings
Optional: Advanced settings. Enter voicemail options, separated by the pipe symbol (|). For example, "review=yes | maxmessage=60" May be left blank.
VM Context
This is the Voicemail Context, which is normally set to "default." Do not change unless you understand the implications.
VMX Locater™
VMX Locater is designed to help a caller reach an operator and/or find you when you are not at your main phone. If enabled, the user will want to consider recording voicemail greetings that instruct a caller on which options to press (0, 1, and/or 2).
Whenever you enter information into the 0, 1, and/or 2 options below, you should run a test to make sure the number is functional, because otherwise the caller might become stranded or receive messages about a number being invalid.
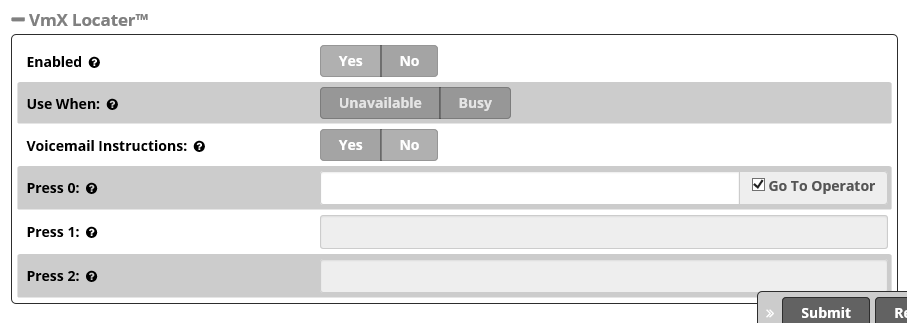
Enabled
Yes/No: Whether to enable the VMX Locater feature. Set to Yes if you would like to enable this feature and edit the options below.
Use When
Select one or more of the buttons to enable VMX Locater for these types of greetings: Unavailable, Busy, and/or Temporary.
Voicemail Instructions
Yes/No: Whether to play instructions after playing your greeting. If set to No, only a beep will be played after your personal voicemail greeting.
Press 0
Check the Go to Operator box to send the caller to the operator when they press 0. Uncheck the Go to Operator box and enter an alternative destination if you want the caller to be sent to a different destination when they press 0. This feature is still accessible to callers even when VMX Locater is disabled for the user.
Press 1
Optional - Enter a destination to send the caller to when they press 1. This can be an internal extension, ring group, queue, or external number such as a cell phone number.
Press 2
Optional - Enter a destination to send the caller to when they press 2. This can be an internal extension, ring group, queue, or external number such as a cell phone number.
Find Me / Follow Me
- Click on the Find Me / Follow Me tab.
- Find Me / Follow Me is enabled by default here so that you may edit the settings. After entering settings, you can disable it if desired.
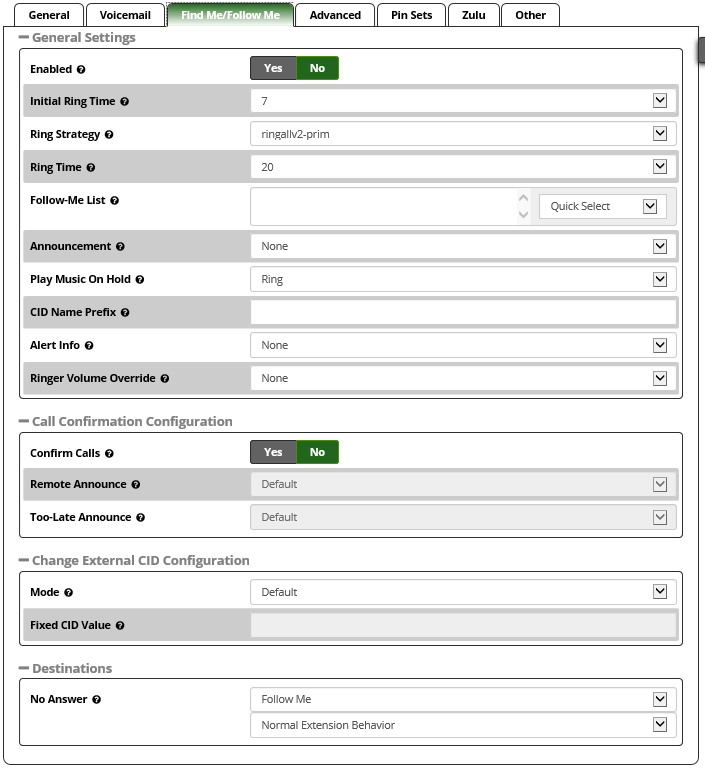
General Settings
Enabled
Yes/No: Whether to enable Find Me / Follow Me. Must be set to Yes (at least temporarily) in order to edit other settings on this page. If you leave it set to Yes, Find Me / Follow Me will be active for this extension when you save the extension and apply config. You can set to No to disable Find Me / Follow Me for an extension until the user activates it.
Initial Ring Time
Use the drop-down menu to select initial ring time, in seconds. This is the number of seconds to ring the primary extension prior to proceeding to the follow-me list. If "0," the primary extension will not be rung before proceeding to the follow-me list. The extension can also be included in the follow-me list.
Ring Strategy
-
- ringallv2: ring Extension for duration set in Initial Ring Time, and then, while continuing call to extension, ring Follow-Me List for duration set in Ring Time.
- ringall: ring Extension for duration set in Initial Ring Time, and then terminate call to Extension and ring Follow-Me List for duration set in Ring Time.
- hunt: take turns ringing each available extension
- memoryhunt: ring first extension in the list, then ring the 1st and 2nd extension, then ring 1st 2nd and 3rd extension in the list.... etc.
- *-prim: these modes act as described above. However, if the primary extension (first in list) is occupied, the other extensions will not be rung. If the primary is in do-not-disturb (DND) mode, it won’t be rung. If the primary is in call forward (CF) unconditional mode, then all will be rung.
- firstavailable: ring only the first available channel
- firstnotonphone: ring only the first channel which is not off hook - ignore CW
Ring Time
Time in seconds that the phones will ring. For all hunt-style ring strategies, this is the time for each iteration of phone(s) that are rung.
Follow-Me List
Enter a list of extensions to ring, one per line, or use the Extension Quick Pick menu below. You can include an extension on a remote system, or an external number, by suffixing a number with a hash (#). ex: 2448089# would dial 2448089 on the appropriate trunk (see Outbound Routing).
Extension Quick Pick
This drop-down menu gives you the option to select existing extensions to add to the Follow-Me List above.
Announcement
Select the message to be played to the caller before dialing the find me / follow me list. Default = none. The drop-down menu shows available system recordings. To add additional recordings, please use the System Recordings module.
Play Music On Hold
If you select a Music on Hold class to play, instead of the default "Ring," the caller will hear that MoH instead of ringing while they are waiting for someone to pick up.
CID Name Prefix
Optional - You can optionally prefix the Caller ID name when ringing extensions in this group. For example, if you prefix with "Sales:", a call from John Doe would display as "Sales:John Doe" on the find me / follow me list extensions that ring.
Alert Info
Optional - You can optionally include an Alert Info, which can create distinctive rings on SIP phones.
Call Confirmation Configuration
Confirm Calls
Yes/No: Whether to confirm external calls. Call confirmation requires the remote party to press 1 to accept the call. This can help prevent an unanswered find me / follow me call from reaching an external voicemail box. This feature only works with the ringall or ringall-prim ring strategies.
Remote Announce
Message to be played to the person receiving the call if Confirm Calls = Yes. You can use the default message or select one of your System Recordings.
Too-Late Announce
Message to be played to the person receiving the call if Confirm Calls = Yes and the call has already been accepted elsewhere.
Change External CID Configuration
Mode
- Default: Transmits the caller’s CID if allowed by the trunk.
- Fixed CID Value: Always transmit the Fixed CID Value below.
- Outside Calls Fixed CID Value: Transmit the Fixed CID Value below on calls that come in from outside only. Internal extension-to-extension calls will continue to operate in default mode.
- Use Dialed Number: Transmit the number that was dialed as the CID for calls coming from outside. Internal extension-to-extension calls will continue to operate in default mode. There must be a DID on the inbound route for this. This will be BLOCKED on trunks that block foreign CallerID.
- Force Dialed Number: Transmit the number that was dialed as the CID for calls coming from outside. Internal extension-to-extension calls will continue to operate in default mode. There must be a DID on the inbound route for this. This WILL be transmitted on trunks that block foreign CallerID.
Fixed CID Value
Fixed value to replace the CID used with some of the modes above. Should be in a format of digits only with an option of E164 format using a leading "+".
Destinations
No Answer
Optional destination call is routed to when the call is not answered on an otherwise idle phone. If the phone is in use and the call is simply ignored, then the busy destination will be used.
Advanced
- Click on the Advanced tab.
- There are many settings in this tab. See below for explanations of the options.
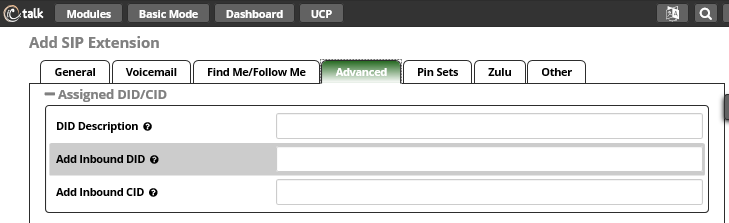
Assigned DID/CID
DID Description
A description for this DID, such as "Fax"
Add Inbound DID
A DID that is directly associated with this extension. The DID should be in the same format as provided by the provider (e.g. full number, 4 digits for 10x4, etc). Format should be: XXXXXXXXXX
Add Inbound CID
Add a CID for more specific DID + CID routing. A DID must be specified in the above Add Inbound DID field. In addition to standard dial sequences, you can also enter Private, Blocked, Unknown, Restricted, Anonymous, Withheld, and Unavailable in order to catch these special cases if the Telco transmits them.
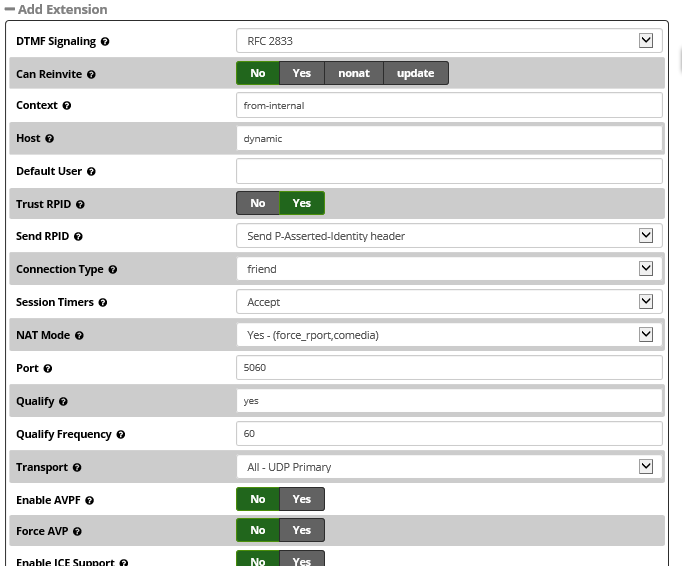
Add Extension
DTMF Signaling
The DTMF signaling mode used by this device, usually RFC for most phones. [dtmfmode]
Can Reinvite
No/Yes/nonat/update: Re-Invite policy for this device, see Asterisk documentation for details. [canreinvite]
Context
Asterisk context this device will send calls to. Only change this is you know what you are doing. [context]
Host
Host settings for this device, almost always dynamic for endpoints. [host]
Trust RPID
Whether Asterisk should trust the RPID settings from this device. Usually should be yes for CONNECTEDLINE() functionality to work if supported by the endpoint. [trustrpid]
Send RPID
Whether Asterisk should send RPID (or PAI) info to the device. Usually should be enabled to the settings used by your device for CONNECTEDLINE() functionality to work if supported by the endpoint. [sendrpid]
Connection Type
Asterisk connection type, usually friend for endpoints. [type]
NAT Mode
NAT setting, see Asterisk documentation for details. Yes usually works for both internal and external devices. Set to No if the device will always be internal. [nat]
-
- Yes - (force_rport,comedia): Always ignore info and assume NAT
- No - (no): Use NAT mode only according to RFC3581 (;rport)
- Force rport - (force_rport): Force rport to always be on.
- comedia - (comedia): Use rport if the remote side says to use it and perform comedia RTP handling.
- Automatic Force Both - (auto_force_rport,auto_comedia): See Below
- Automatic Force rport - (auto_force_rport): Force rport if Asterisk detects that an incoming SIP request crossed a NAT after being sent by the remote endpoint.
- Automatic comedia - (auto_comedia): Use comedia if Asterisk detects that an incoming SIP request crossed a NAT after being sent by the remote endpoint.
- never - (no): Never attempt NAT mode or RFC3581 support
- route - (force_rport): Assume NAT, don’t send rport
Port
Endpoint port number to use, usually 5060. Some 2-port devices such as ATA may use 5061 for the second port.
Qualify
Setting to yes (equivalent to 2000 msec) will send an OPTIONS packet to the endpoint periodically (default every minute). Used to monitor the health of the endpoint. If delays are longer then the qualify time, the endpoint will be taken offline and considered unreachable. Can be set to a value which is the msec threshhold. Setting to no will turn this off. Can also be helpful to keep NAT pinholes open.
Qualify Frequency
Frequency in seconds to send qualify messages to the endpoint.
Transport
This sets the allowed transport settings for this device and the default (Primary) transport for outgoing. The default transport is only used for outbound messages until a registration takes place. During the peer registration the transport type may change to another supported type if the peer requests so. In most common cases, this does not have to be changed as most devices register in conjunction with the host=dynamic setting. If you are using TCP and/or TLS you need to make sure the general SIP Settings are configured for the system to operate in those modes and for TLS, proper certificates have been generated and configured. If you are using websockets (such as WebRTC) then you must select an option that includes WS.
Enable AVPF
Whether to Enable AVPF. Defaults to no. The WebRTC standard has selected AVPF as the audio video profile to use for media streams. This is not the default profile in use by Asterisk. As a result the following must be enabled to use WebRTC.
Force AVP
Force ’RTP/AVP’, ’RTP/AVPF’, ’RTP/SAVP’, and ’RTP/SAVPF’ to be used for media streams when appropriate, even if a DTLS stream is present.
Enable ICE Support
Whether to Enable ICE (Interactive Connectivity Establishment) Support. Defaults to no. ICE is a protocol for Network Address Translator (NAT) traversal for UDP-based multimedia sessions established with the offer/answer model. This option is commonly enabled in WebRTC setups.
Enable Encryption
Whether to offer SRTP encrypted media (and only SRTP encrypted media) on outgoing calls to a peer. Calls will fail with HANGUPCAUSE=58 if the peer does not support SRTP. Defaults to no.
Call Groups
Callgroup(s) that this device is part of. Can be one or more callgroups, e.g. "1,3-5" would be in groups 1,3,4,5.
Pickup Groups
Pickupgroups(s) that this device can pickup calls from. Can be one or more groups, e.g. ’1,3-5’ would be in groups 1,3,4,5. Device does not have to be in a group to be able to pick up calls from that group.
Disallowed Codecs
Disallowed codecs. Set this to "all" to remove all codecs defined in the general settings, and then specify specific codecs separated by "&" on the "allow" setting, or just disallow specific codecs separated by "&".
Allowed Codecs
Allow specific codecs, separated by the "&" sign and in priority order. E.g. "ulaw&g729". Codecs allowed in the general settings will also be allowed unless removed with the "disallow" directive above.
Dial
How to dial this device. This should not be changed unless you know what you are doing.
Account Code
Account code for this device.
Mailbox
Mailbox for this device. This should not be changed unless you know what you are doing. This will be automatically set to: <extnum>@device
With an LDAP backend, to enable MWI (Message waiting indication), enter a semi-colon list of mailboxes in the form <extnum>@default
e.g. 101@default;102@default ...where the message lamp will light if any of the specified mailboxes has unread mail
Voicemail Extension
Asterisk dialplan extension to reach voicemail for this device. Some devices use this to auto-program the voicemail button on the endpoint. If left blank, the default vmexten setting is automatically configured by the voicemail module. Only change this on devices that have special needs.
Deny
IP Address range to deny access to, in the form of network/netmask.
Permit
IP Address range to allow access to, in the form of network/netmask. This can be a very useful security option when dealing with remote extensions that are at a known location (such as a branch office) or within a known ISP range for some home office situations.
CID Num Alias
The CID Number to use for internal calls, if different from the extension number. This is used to masquerade as a different user. A common example is a team of support people who would like their internal CallerID to display the general support number (a ringgroup or queue). There will be no effect on external calls.
SIP Alias
If you want to support direct sip dialing of users internally or through anonymous sip calls, you can supply a friendly name that can be used in addition to the users extension to call them.
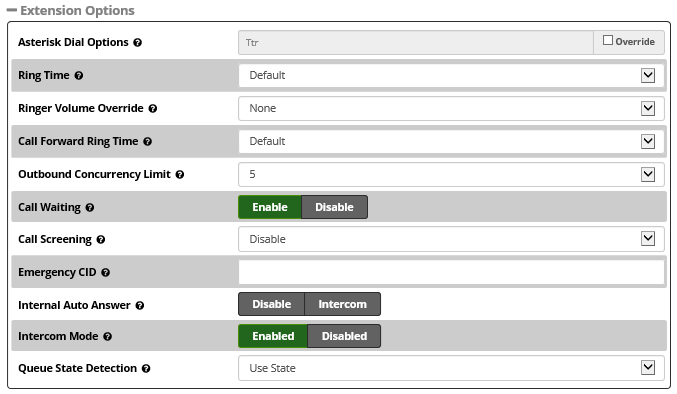
Extension Options
Asterisk Dial Options
Cryptic Asterisk Dial Options. Check the override box to customize for this extension, or un-check to use system defaults set in Advanced Options. These will not apply to trunk options, which are configured with the trunk.
Ring Time
Number of seconds to ring prior to going to the "no answer" destination. Default will use the global default value set in Advanced Settings. If no voicemail is configured this will be ignored.
Call Forward Ring Time
Number of seconds to ring during a Call Forward, Call Forward Busy or Call Forward Unavailable call prior to continuing to voicemail or specified destination. Setting to Always will cause the phone to just continue to ring without going to the "no answer" destination. Default will use the current Ring Time. If voicemail is disabled and a destination is not specified, it will be forced into Always mode.
Outbound Concurrency Limit
Maximum number of outbound simultaneous calls that an extension can make. This is also very useful as a security protection against a system that has been compromised. It will limit the number of simultaneous calls that can be made on the compromised extension.
Call Waiting
Enable/Disable: Set the initial/current Call Waiting state for this user’s extension. If disabled, a second concurrent incoming call would be sent to this extension’s "busy" destination.
Internal Auto Answer
Disable/Intercom: When set to Intercom, calls to this extension/user from other internal users act as if they were intercom calls meaning they will be auto-answered if the endpoint supports this feature and the system is configured to operate in this mode. All the normal white list and black list settings will be honored if they are set. External calls will still ring as normal, as will certain other circumstances such as blind transfers and when a Follow Me is configured and enabled. If Disabled, the phone rings as a normal phone.
Call Screening
Call Screening requires external callers to say their name, which will be played back to the user and allow the user to accept or reject the call. Screening with memory only verifies a caller for their CallerID once. Screening without memory always requires a caller to say their name. Either mode will always announce the caller based on the last introduction saved with that CallerID. If any user on the system uses the memory option, when that user is called, the caller will be required to re-introduce themselves and all users on the system will have that new introduction associated with the caller’s CallerID.
Pinless Dialing
Enabling Pinless Dialing will allow this extension to bypass any PIN codes normally required on outbound calls.
Emergency CID
This Caller ID will always be used when dialing out an Outbound Route that is designated as an "Emergency" route (i.e. when dialing 911). The Emergency CID overrides all other CallerID settings.
Queue State Detection
If this extension is part of a queue, then the queue will attempt to use the user’s extension state or device state information when determining if this queue member should be called. In some uncommon situations, such as a Follow-Me with no physical device, or some virtual extension scenarios, the state information will indicate that this member is not available even when it is available. Setting this to Ignore State will make the queue ignore all state information, thus always trying to contact this member. Certain side effects can occur when this route is taken due to the nature of how queues handle local channels. For example, subsequent transfers will continue to show the member as busy until the original call is terminated. In most cases, this should be set to Use State.
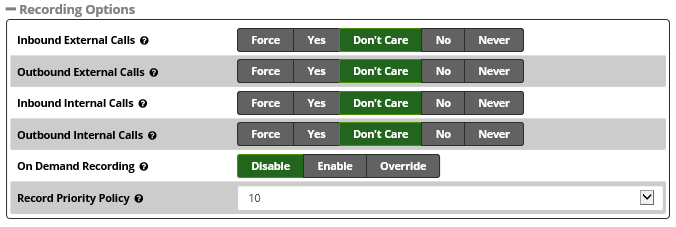
Recording Options
Inbound External Calls
Force/Yes/Don’t Care/No/Never: Recording of inbound calls from external sources.
Outbound External Calls
Force/Yes/Don’t Care/No/Never: Recording of outbound calls to external sources.
Inbound Internal Calls
Force/Yes/Don’t Care/No/Never: Recording of calls received from other extensions on the system.
Outbound Internal Calls
Recording of calls made to other extensions on the system.
On Demand Recording
Disable/Enable/Override: Enable or disable the ability to do on demand (one-touch) recording. The overall calling policy rules still apply, and if calls are already being recorded by "Force" or "Never," the cannot be paused unless "Override" is selected.
Record Priority Policy
This is the call recording policy priority relative to other extensions when there is a conflict (i.e. one extension wants to record and the other extension does not). The higher of the two priorities determines the policy. If the two priorities are equal, the global policy (caller or callee) determines the policy.
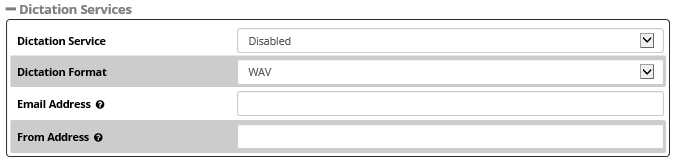
Dictation Services
Dictation Service
Disabled/Enabled: Whether Dictation service is available for this extension.
Audio format to use for dictation (Ogg Vorbis, GSM, or WAV).
Email Address
The email address that completed dictations are sent to.
From Address
The email address that completed dictations are sent from. Format is "A Persons Name <email@address.com>", without quotes, or just a plain email address.
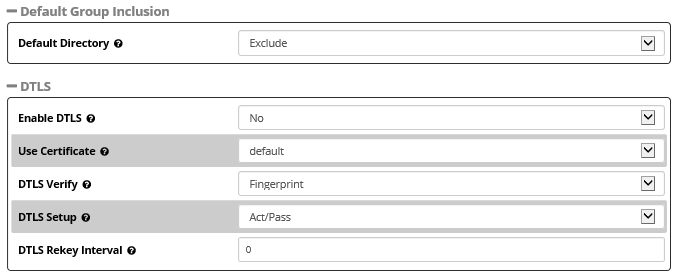
DTLS
(Datagram Transport Layer Security)
Enable DTLS
No/Yes: Enable or disable DTLS-SRTP support.
Use Certificate
The Certificate to use from Certificate Manager
DTLS Verify
Verify that provided peer certificate and fingerprint are valid.
-
- Yes: Perform both certificate and fingerprint verification
- No: Perform no certificate or fingerprint verification
- Fingerprint: Perform ONLY fingerprint verification
- Certificate: Perform ONLY certificate verification
DTLS Setup
Whether we are willing to accept connections, connect to the other party, or both. This value will be used in the outgoing SDP when offering and for incoming SDP offers when the remote party sends actpass
-
- Active: we want to connect to the other party
- Passive: we want to accept connections only
- Act/Pass: we will do both
DTLS Rekey Interval
Interval at which to renegotiate the TLS session and rekey the SRTP session. If this is not set or the value provided is 0 rekeying will be disabled.
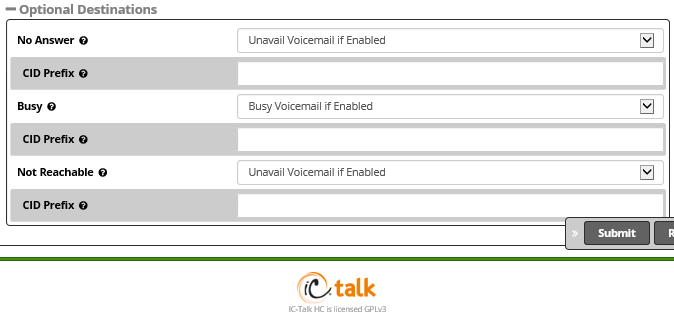
Optional Destinations
No Answer
Optional destination call is routed to when the call is not answered on an otherwise idle phone. If the phone is in use and the call is simply ignored, then the busy destination will be used instead.
CID Prefix
Optional CID Prefix to add before sending to this no answer destination.
Busy
Optional destination the call is routed to when the phone is busy or the call is rejected by the user. This destination is also used on an unanswered call if the phone is in use and the user chooses not to pick up the second call.
CID Prefix
Optional CID Prefix to add before sending to this busy destination.
Not Reachable
Optional destination the call is routed to when the phone is offline, such as a softphone currently off or a phone unplugged.
CID Prefix
Optional CID Prefix to add before sending to this not reachable destination.
Other
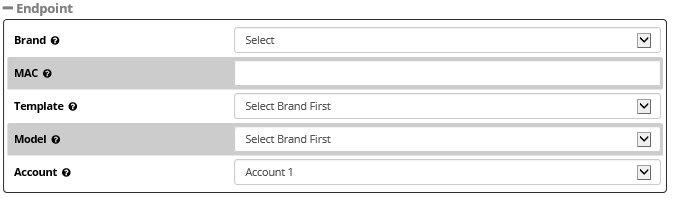
Endpoint
Brand
Brand of device to be provisioned
MAC
MAC Address of device to be provisioned
Template
Template to use for device
Model
Model of device to be provisioned
Account
Account number to be assigned

XactView Settings
Add to XactView
yes/no: Whether to Makes this extension available in XactView
Auto Answer
yes/no: Whether to make this extension automatically answer the initial call received from the system when performing an origination within XactView. Only works with Aastra, Grandstream, Linksys, Polycom, Sangoma and Snom phones.
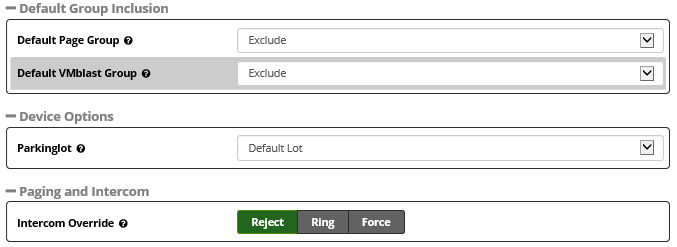
Default Group Inclusion
Default Page Group
Exclude/Include: Whether this extension/device will be part of the default page group.
Default VMblast Group
Exclude/Include: Whether this extension/device will be part of the default voicemail blast group. Include will be ignored if the user does not have a voicemail box.
Device Options
Parkinglot
Choose a default Parking Lot for this extension.
Saving the Extension
- Click the Submit button
- Click the Apply Config button
Article ID: 110
Created: Tue, Aug 1, 2017
Last Updated: Tue, Aug 1, 2017
Author: Mark Simcoe
Online URL: https://kb2.ic.uk/article.php?id=110