Introduction
The following document type provides a comprehensive user guide on how to use a BTW provided system/portal. Where appropriate the guide will be backed up by screenshots to support the recipient of this guide.
The Business Portal is our Feature Management Portal, often referred to as Configuration Portal. It allows users to configure and manage communications features and settings, based on their profile level.
Business Portal can be logged onto from the following devices:
Business Portal supports the follow browsers:
Please note, all screenshots displayed in this guide are from the default branded Business Portal. If you have chosen to rebrand the portal then these images will look different, but the functionality is the same.
The Business Portal allows an End User to perform the following tasks:
Throughout this document the terms User and Employee will be interchanged, but both mean the same thing – a person using the service and whom has access to the Business Portal.
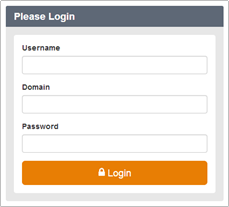
Log into the portal from the following URL: https://portal.yourwhc.co.uk/businessportal/login.jsp. and login with your username/password/domain
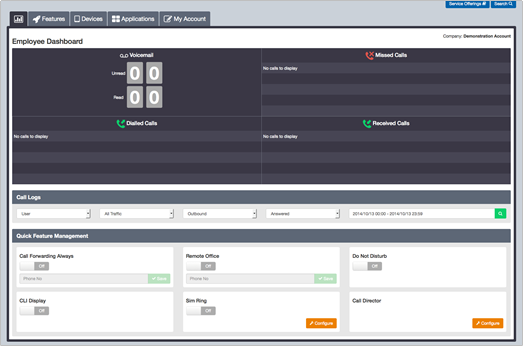
When you log in for the first time, you will be greeted with your Dashboard screen (see more under Dashboard Description):
Passwords will expire every 90 days and a User will be asked to enter a new password once this period has expired. When changing this password, a User will not be able to use the previous password. When entering a new password the following rules must be adhered to:
Password resets for User Administrators can only be rectified by a CP, Company or Group Administrator. If you need to reset a password, please contact one of these administrators.
Locked accounts
If you enter the wrong credentials into the portal 3 times in a 4 hour period, your account will be locked. This account will then stay locked for 4 hours, after which you can then enter the correct credentials.
Alternatively you can contact your administrator, with a role of CP, Company or Group, and they can use the Force Unlock option to unlock this ahead of the 4 hour period, and if needed reset the password.
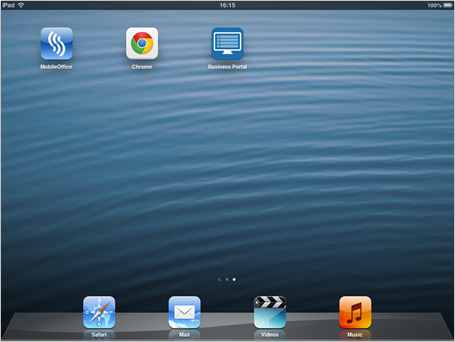
Saving the Business Portal as a Home Screen on IOS
Access Business Portal on your iOS device and you can save it to the home screen. By doing so, it effectively behaves like an app:

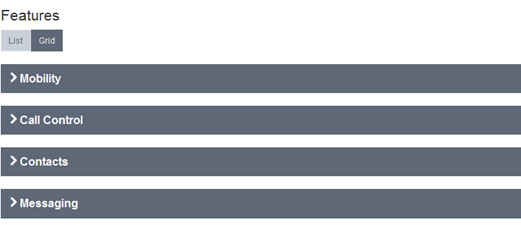
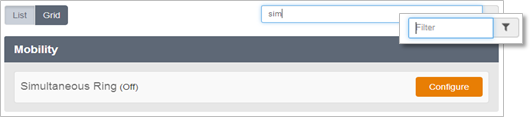
You can choose to display their features via two options, either List or Grid as displayed below:
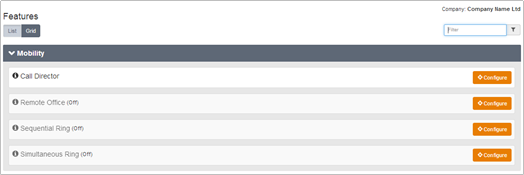
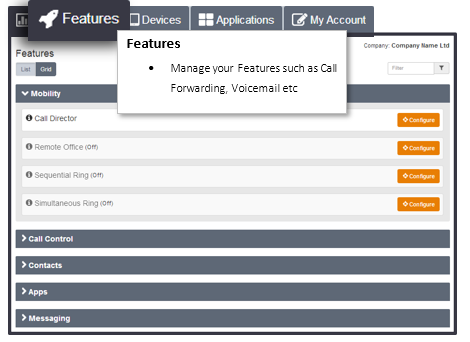
Wherever there is an Information Icon, you will be able to place your mouse cursor over it to get more information, for example:

You can use filters to find Features quickly, simply start typing the Feature Name in the filter box:

The following screenshots are used to provide a quick overview of the high-level functionality of the portal.
The Business Portal uses tabs to navigate to the different sections of the portal and by default the landing page is the dashboard.

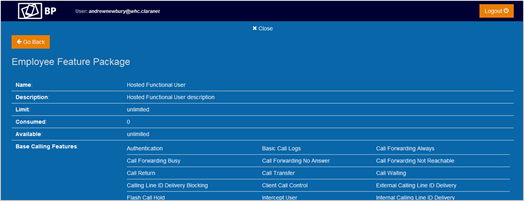
By clicking on the Service Offerings link, a User is able to view what feature pack they have been allocated, along with the features contained within the pack and any associated add-ons. A feature package represents a specific collection of features and services:
You can use the Search function at the top of the page to search for other users within the same company. It offers a dynamic search facility across the following fields:

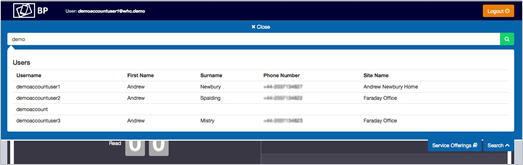
End-Users can then use this information to see the contact details of their colleagues.


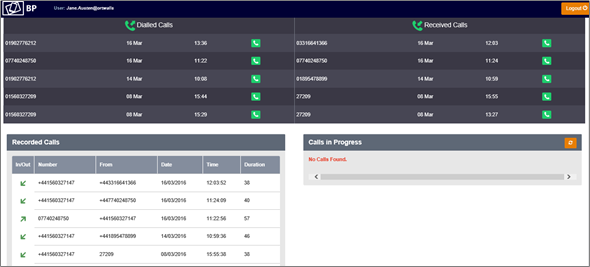
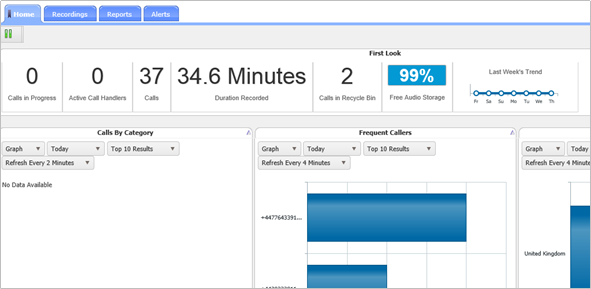
If you have Voice Recording enabled then the dashboard display will look slightly different as per the image below.
Devices Display
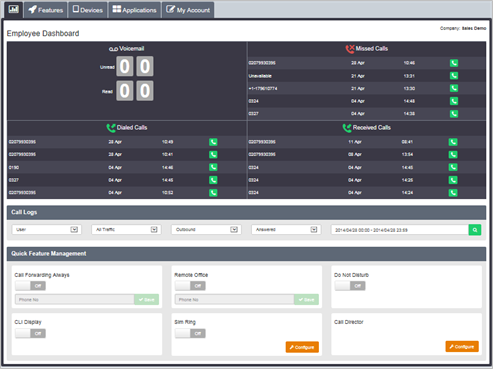
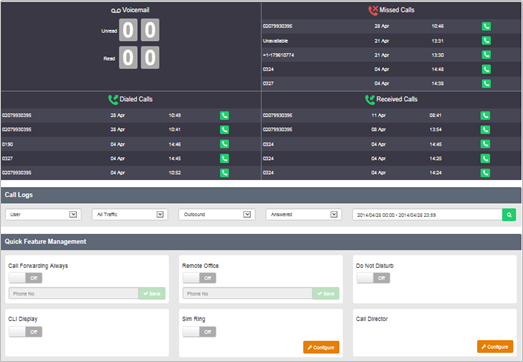
By default, the Dashboard is displayed when you log in to the Business Portal. There is a visual quick stats section that will display the following:
The Employee Dashboard contains a section on Voice Recording where the user has had this enabled by a CP or Company Administrator. This is sectioned into 3 key areas:
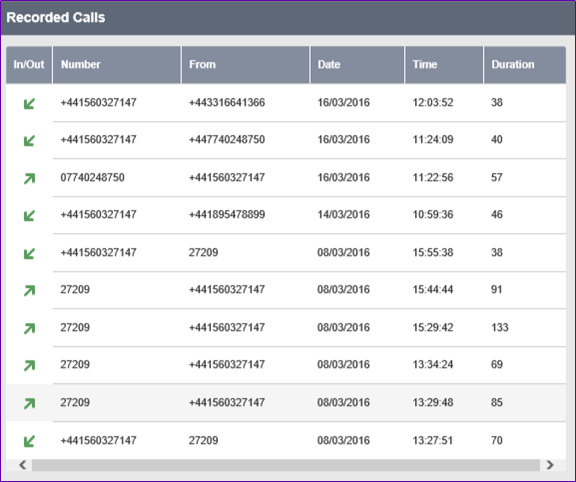
A Recorded Calls screenshot can be seen below and contains the following, which is informational only:
A Calls in Progress screenshot can be seen below and if the user has any of these settings, Always with Pause/Resume, On Demand, On Demand with UI Start, they can click on the Action button to record a call.
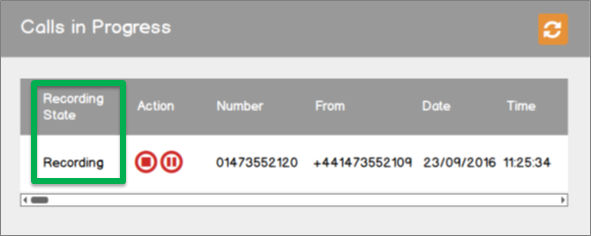
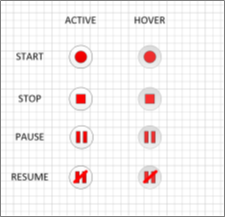
Within the Action column, the User will have access to the following buttons.
If the Details button is selected, this will open up the Voice Recording portal in another window.

From here the User may see and play their calls. Please review the Call Recording Application Guide for further details on how to use this.
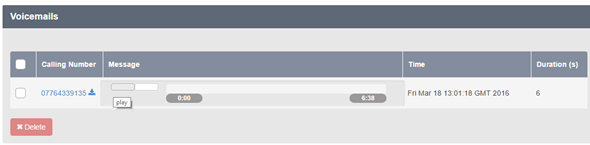
The Employee Dashboard contains a Voicemail feature which will display the last 10 voicemails and allows the Employee to:
The Employee Dashboard contains a Click-to-Dial feature which allows you to call any of the numbers shown in ‘Missed Calls’, Dialled Calls’ and ‘Received Calls’.
To intiate a call you should click the telephone icon next to the telephone number to perform this action. Your device(s) will ring, upon which you must answer this call. Once you do this, it will connect the call to the called party. To hang up, you can click the telephone icon next to the number dialled.

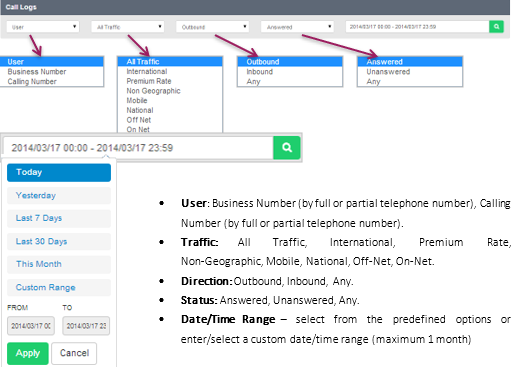
Call Logs provide a set of call analysis features that allows you to view and analyse call information. This interface allows you to visualize trends and patterns, zoom in on detailed data or view key headline information at a glance:
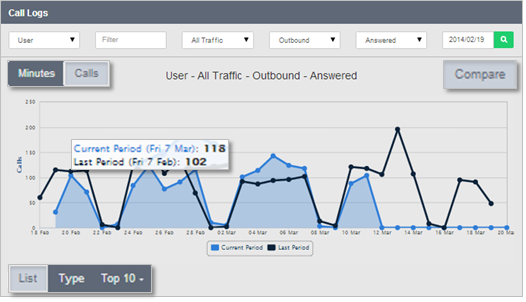
Call Logs Graphical View and Comparison
Once you have selected the call log criteria and clicked search, a graph with various options becomes available:
The following options will then become available for you to enable you to tailor your analysis:
The List View provides individual call information on the results of your search including the Business Number, Time, Duration, Calling Number, Destination and Call Status:

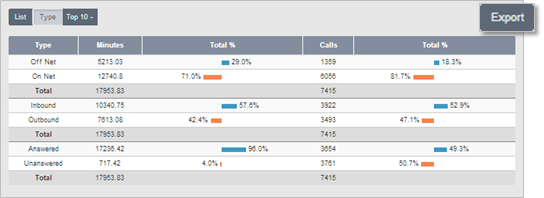
The Type View allows you to instantly compare different types of calls to provide key information including the amount of Off-Net calls versus On-Net calls, Inbound versus Outbound and Answered versus Unanswered. The Type View displays the percentage split of total minutes and total calls for each call type:
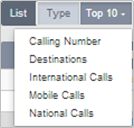
The Top 10 View provides the 10 highest results based on your search and top 10 category selection. For example, this allows you to see the top 10 destinations or numbers involved in:
You can use the Export Tool (detailed below) to save the full results of the current Top 10, Type or List View to a downloadable CSV file.

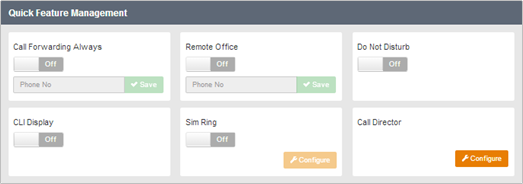
Quick Feature Management allows you quick access to the most commonly used features:

You can select the Features Tab to manage any of the features included in your service. Features are categorised in the following categories:
The filter search allows you to type in the first few letters of the feature you’re looking for displaying the matches.

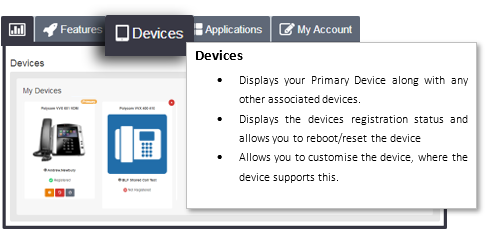
Select this Tab to view the Devices (IP Phones, Smart Phones, Desktop clients etc.) associated with your account. These devices share the same line, so that incoming calls ring on all of the devices simultaneously and outbound calls can be made from any one of the associated devices. IP Phones will be displayed with a high resolution image of the device if it is using the latest Visual Device Manager (VDM) profile.
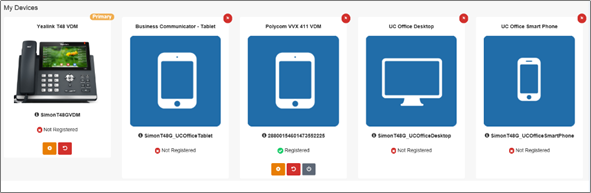
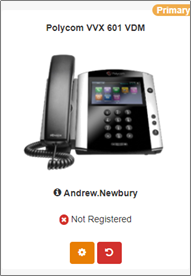
From this tab you can also see an IP Phones registration status:
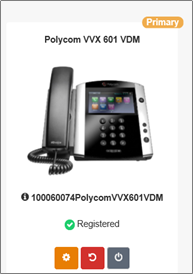
If you hover over the registration status you can also see further information on the phone:
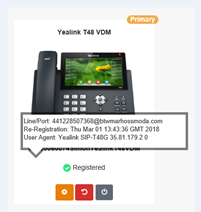

If registered, a device reboot icon will be available.
Selecting this button will instruct the phone to reboot shortly, please be patient whilst this is initiated. Once selected, the screen will update with the message below and you will see that the phone powers off and then back on.
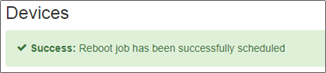
The reboot button will be replaced with a Reboot Status hyperlink.
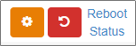
Clicking on this will show you the status of the reboot, and the following options may be seen:
Not Stared - Device has not been rebooted yet
Pending - Reboot command has been sent to the device
Error - There was an error while trying to reboot the device:
Once the phone has successfully rebooted and re-registered, the reboot button will appear again. With some lesser known browsers you may need to click on the Reboot Status link and hit Clear Job to make the button re-appear.
If the user has made lots of changes in error or simply wants to start again, they can select the Reset option which will restore the configuration file back to its original out of the box working state.

Once selected it will show the following message advising you to reboot the device in order to instruct the phone to update itself with the new configuration file.

If the device is using a VDM device type then a high resolution image of the device will be shown, similar to the image below.

The Configure button will then be available to use.

Once you click on this button you will be presented with the page below and the following tabs will be available:
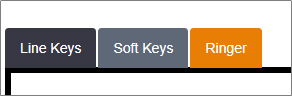
Line Keys
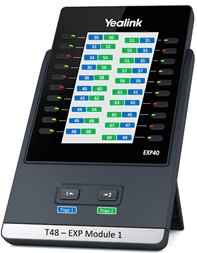
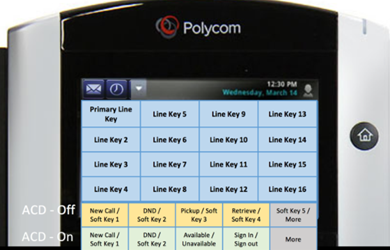
A Line key is a soft/hard key that the phone manufacturer has determined can be used for the purpose of assigning a phone number to. The number of available keys depends on the manufacturer and the model number. When you click the customise button it will present you with a static image displaying the number of available keys. Most phones have up to 3 different pages of customisations, and if you are using a Sidecar there will be additional pages, so please ensure you use the Next button to see the options available.

When you click on the Edit button against a key option, whether in use or spare, the following will be available in the drop down:
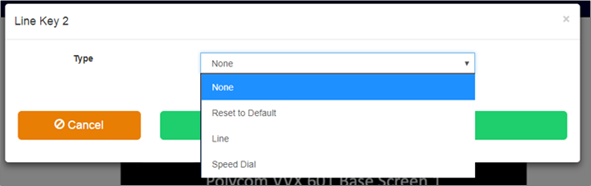
Please note, all un-used keys will have a Type set as BLF, this is just to allow the BLFs to automatically update if you use this feature. If you don’t then you simply use these keys as they are spares.
Assign a Line Key
If you have had an Additional Line or Shared Call Appearance created for you by your Administrator, then this new line will automatically appear in the next available spare Line Key. If you are not happy with this position then you can move it.
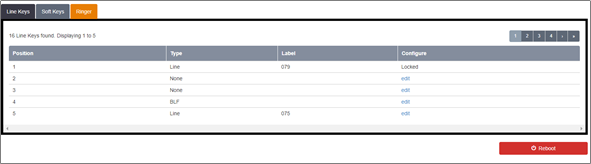
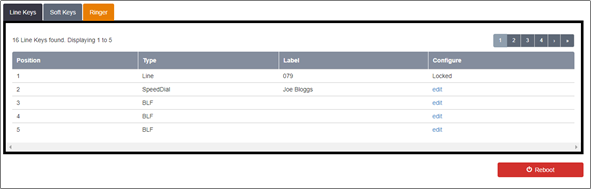
Locate the Line Key as per the example below and select edit.

From the dialogue box, change to None to remove the key from this position.
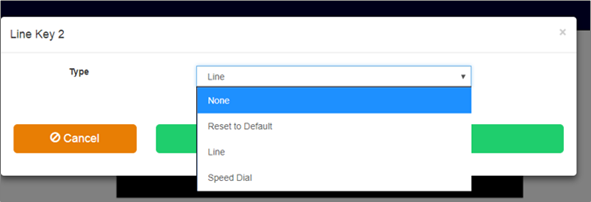
Then locate the key slot that you want to place the Line key in and select edit. From here, select Line and then it will automatically assign the line key to this slot.
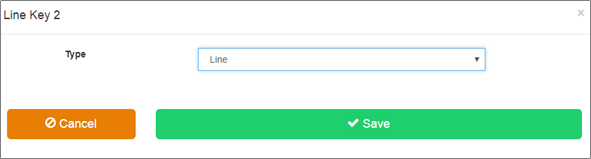
Click on Save and they you will be presented with the following message.

If you have further changes to make then make these first. Otherwise scroll to the bottom of the page and select the Reboot button. This will instruct the phone to power off and then back on, once it has powered on the Line Key will appear in the new position.
Please note the image displayed in the portal is static so will not change, only the table will update to show the key is being used. To re-order any keys, you first need to remove then and then reassign them to the slot you require.
Assign a Speed Dial Key
To assign a Speed Dial, select edit against a key that is spare, remembering that a spare key will show BLF, but the label will be blank.
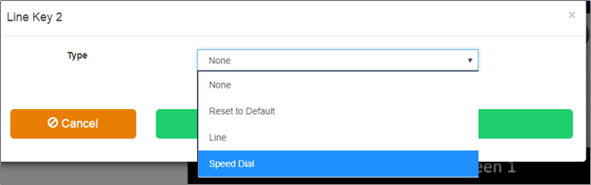
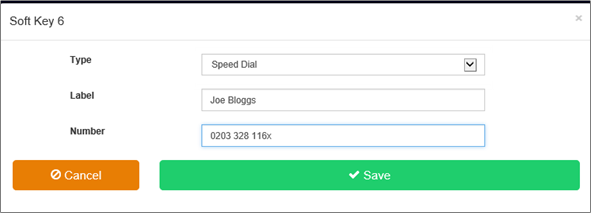
Select Speed Dial from the Type drop down.
Insert a name in the Label box, which will display on the phone, typically this will be the name of the person whom the number belongs to. Enter the telephone number into the Number parameter, ensuring you enter this correctly as there is no validation on the number entered here.
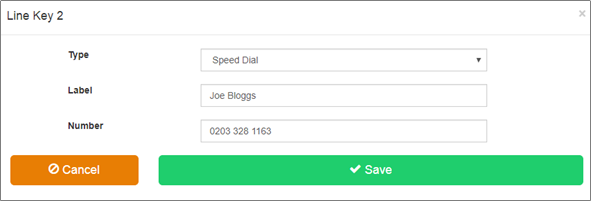
Click on Save and you will be presented with the following message.

If you have further changes to make then make these first. Otherwise scroll to the bottom of the page and select the Reboot button. This will instruct the phone to power off and then back on, once it has powered on the Speed Dial will appear on the phone.
Please note the image displayed in the portal is static so will not change, only the table will update to show the key is being used. To re-order any keys, you first need to remove then and then reassign them to the slot you require.
Assign a BLF Key
You can’t assign a BLF key from the Configure option, BLF numbers are set and displayed in the order as defined within the Features setting page. BLF numbers will automatically take the next available line key.

Soft Keys
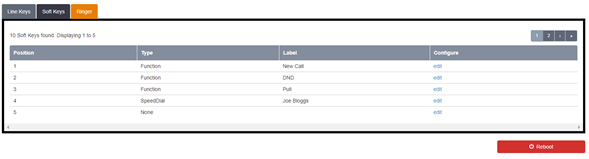
A Soft key is a soft/hard key that the phone manufacturer has determined can be used for the purpose of assigning functions to. The number of keys available depends on the manufacturer and the model number. When you click the customise button it will present you with a static image displaying the number of available keys. Most phones have up to 3 different pages of customisations so please ensure you use the Next button to see the options available.
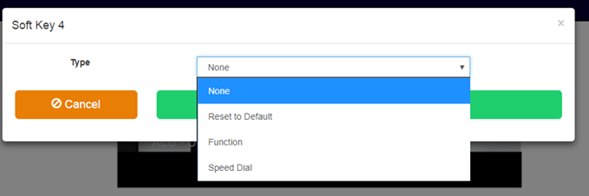
When you click on the Edit button against a key option, whether in use or spare, the following will be available in the drop down:

Assign a Function Key
To assign a Function key, select edit against a key that is spare.

Select Function from the Type drop down.
Select one of the options from the Function drop down.
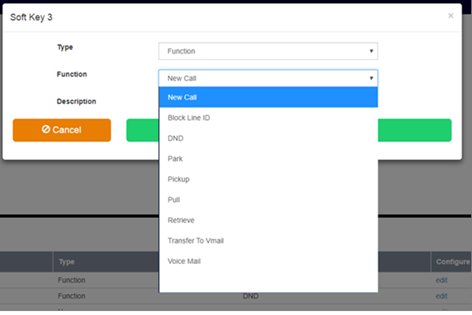
Once you select a function key it will also provide a brief description of the keys operation.
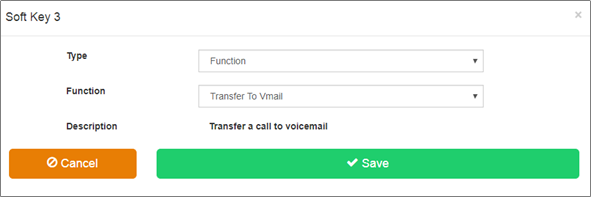
Click on Save and you will be presented with the following message.

If you have further changes to make then make these first. Otherwise, scroll to the bottom of the page and select the Reboot button. This will instruct the phone to power off and the back on, once it has powered on the Function Key will appear on the phone.
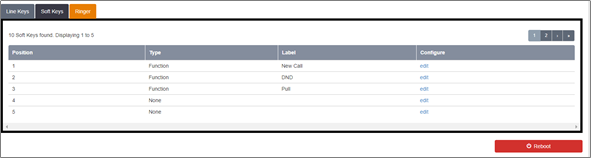
Please note the image displayed in the portal is static so will not change, only the table will update to show the key is being used. To re-order any keys, you first need to remove then and then reassign them to the slot you require.
Assign a Speed Dial Key
To assign a Speed Dial, select edit against a key that is spare

Select Speed Dial from the Type drop down.

Insert a name in the Label box, which will display on the phone, typically this will be the name of the person whom the number belongs to. Enter the telephone number into the Number parameter, ensuring you enter this correctly as there is no validation on the number entered here.
Click on Save and they you will be presented with the following message.

If you have further changes to make, then make these first. Otherwise, scroll to the bottom of the page and select the Reboot button. This will instruct the phone to power off and then back on, once it has powered on the Speed Dial will appear on the phone.
Please note the image displayed in the portal is static, so will not change, only the table will update to show the key is being used. To re-order any keys, you first need to remove then and then reassign them to the slot you prefer.
The enables you to change the default audible ring tone used by the phone. If you would like to hear samples of these before you set this, then you need to do this on the phone as per the instructions below:
Polycom Devices
Yealink Devices
The following is for the T42 device:
Although you can set the ringer on the phones it will not add it to the configuration file and any future updates will remove it. To set correctly you must do this in the Business Portal by selecting the Ringer tab.
This will then bring up a series of options, select the one you like based on what you found on the phone.
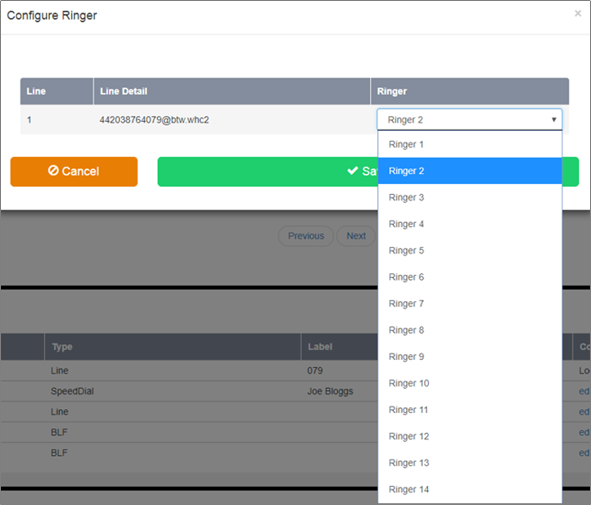
Click on Save and you will be presented with the following message.

If you have further changes to make then make these first. Otherwise, scroll do the bottom of the page and select the Reboot button. This will instruct the phone to power off and then back on, once it has powered on the Ringer will have changed.

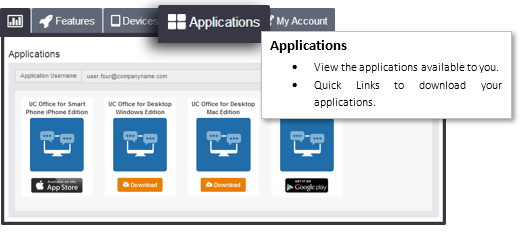
The Applications area allows you to view and download any applications that are part of your service. These can include PC, Mac, Smart Phone and Tablet applications.
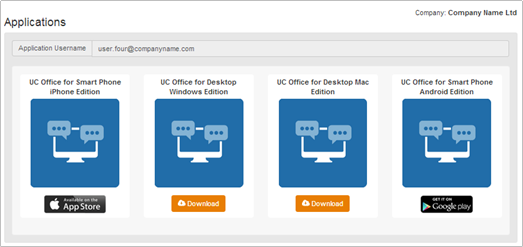
This page also displays the Application Username that will need to be entered, along with the password, into any application being used.

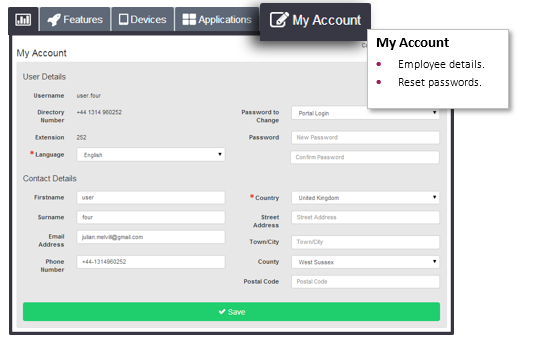
The accounts tab is broken down into two sections as per the items below
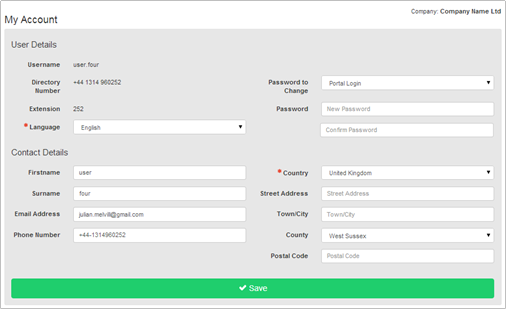
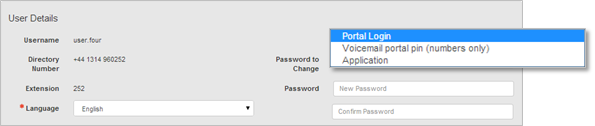
You can reset your passwords for Voicemail (Numbers Only), Applications and Portal Login by selecting the drop down list “Password to Change” option.
Article ID: 235
Created: Thu, May 9, 2019
Last Updated: Thu, May 9, 2019
Author: Keira Tait
Online URL: https://kb2.ic.uk/article.php?id=235