Note: You will need to ensure you have one of the following email addresses configured on your mail server as the certificate authorisation will be sent to one of the following of your choice
admin@yourdomain.co.uk
administrator@yourdomain.co.uk
hostmaster@yourdomain.co.uk
webmaster@yourdomain.co.uk
postmaster@yourdomain.co.uk
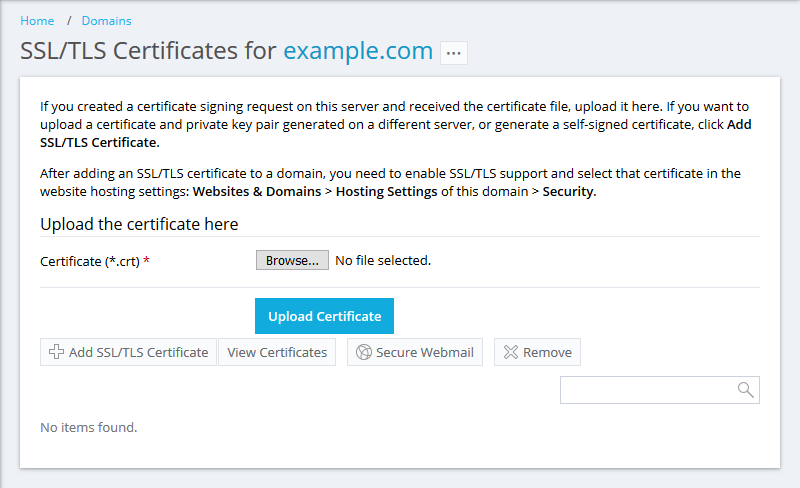
Go to Domains > example.com > SSL/TLS Certificates.
Note: If you are using the SSL It! extension, click Advanced Settings.
On the SSL/TLS Certificates page, add your certificate:
Note: If you are experiencing issues with a certificate installation, contact your certificate seller and ask for certificate installation instructions for Plesk.
If an SSL certificate is stored in a single *.crt file:
Click Browse... to select a certificate file. Then click Upload Certificate.
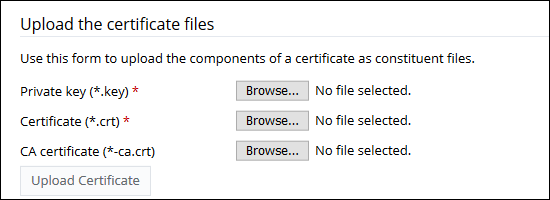
If an SSL certificate is stored in the form of *.key and *.crt files:
Click Add SSL/TLS Certificate and scroll down to the Upload the certificate files section and upload these files. If both the certificate and the private key parts of your certificate are contained in a *.pem file (you can check it by opening the *.pem file in any text editor), just upload it twice, both as the private key and the certificate. Click Upload Certificate once finished.
 #
#
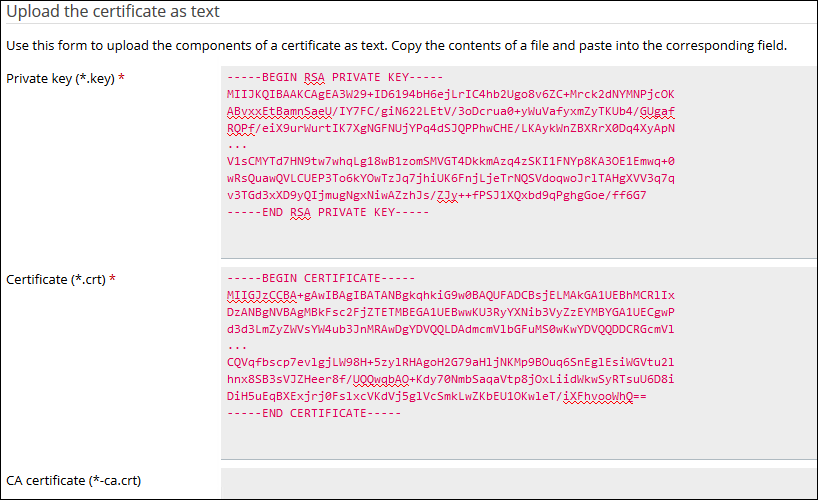
If an SSL certificate is stored as a text:
Click Add SSL/TLS Certificate and scroll down to the Upload the certificate as text section. There, paste the certificate and the private key parts into the corresponding fields. Click Upload Certificate when you have finished.
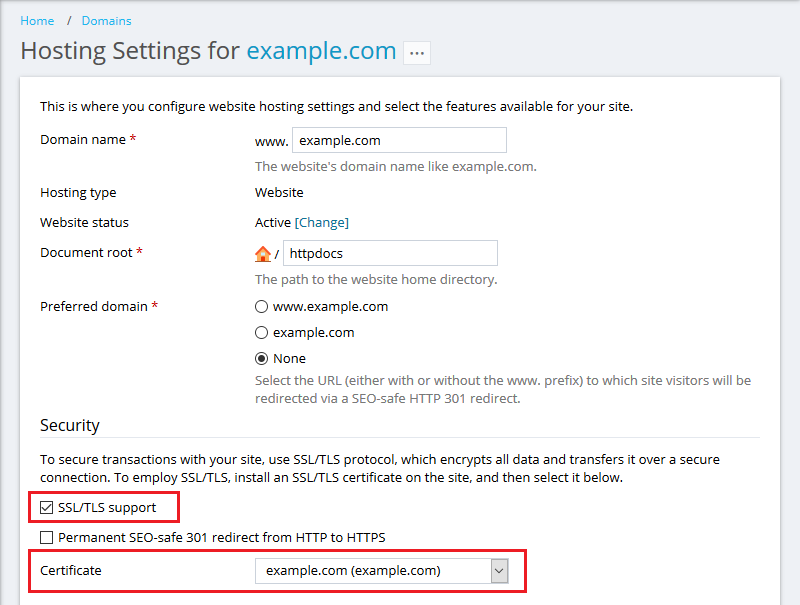
Once the certificate is created, go to Domains > example.com > Hosting Settings and:
enable SSL support
select your created SSL certificate click OK
Open your website at https://example.com.
Note: In case of any issues, make sure that the certificate was properly selected.
Article ID: 254
Created: Tue, Feb 11, 2020
Last Updated: Tue, Feb 11, 2020
Author: Keira Tait
Online URL: https://kb2.ic.uk/article.php?id=254