FTTC & FTTP (Managed Install) Zyxel Router VMG1312-B10D Initial Setup
FTTC & FTTP (Managed Install) Zyxel Router VMG1312-B10D Initial Setup
This article is to show you how to set up your router once you have receive it from Internet Central. Inside the routers box there will be an IC configuration sheet. This is where you will know which type of FTTC/FTTP connection you have. Wires Only FTTC/FTTP will not require a modem however a Managed Install will.
The router needs to be connected to two things;
- The main socket for the building
- A Wall plug to get power for both the router and your modem
Your modem will not be provided by us.
Find a location that is close to the points above but also consider your network devices and how you want to connect to the router.
For example,
If you are going to be using a cabled connection to your PC/Laptop, you will need to be close enough to the router that you can directly plug your Ethernet cable into it.
If you are going to be using WiFi connection to your PC/Laptop, test out a few different places to see where your connection is strongest.
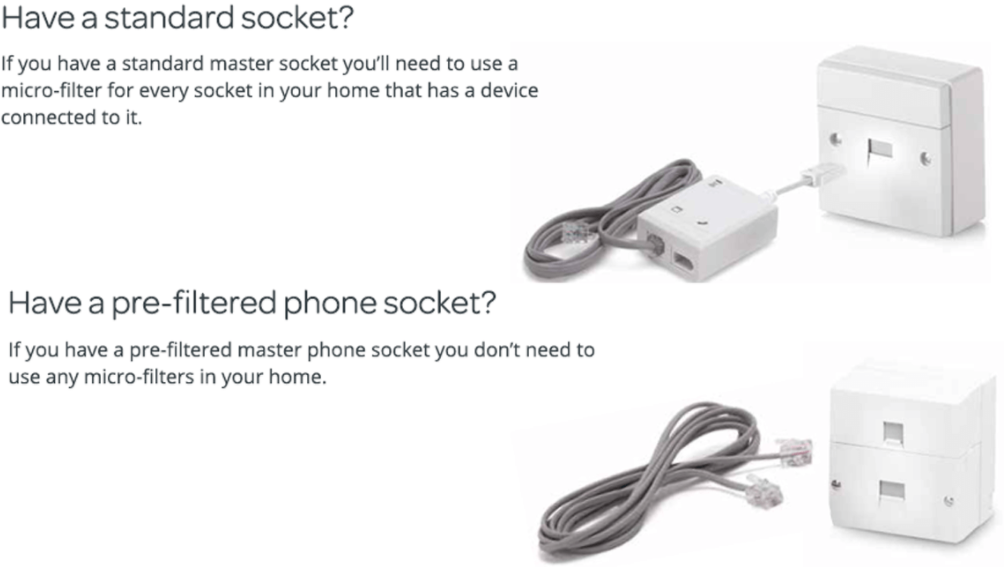
Start with the main socket. Plug in the micro filter that comes with the router into the main socket. Now take the grey RJ11 cable (This is provided in the router box) and connect one end into the DSL port on the modem. The other end is connected to the RJ11 port in the micro filter. If you have a pre-filtered socket then you will just need to connect the RJ11 cable from the main socket to the DSL port on the modem.
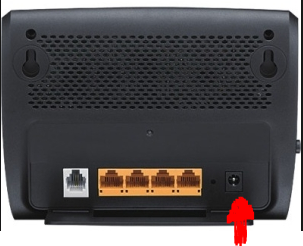
Now take the power adapter for the router and connect it by plugging it into a wall plug and into the power slot on the back of the router. Once this is plugged in, switch on the router and wait until the power light turns to a solid green.

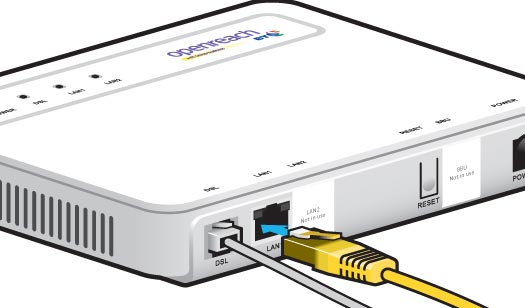
You will now need to take an Ethernet cable and connect one end into the LAN 1 port on the modem and the other end into the LAN 4/WAN port on the back of the router.
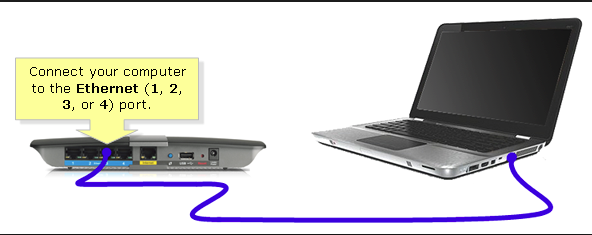
Once the above step is completed and the power light is solid, then you can take the yellow RJ45 cable inside the routers box (you can use your own if this one is not long enough) and connect one end to any LAN port other than number 4 on the back of the router. The other end is connected to your network device such as your PC/Laptop.
 Yes the router in the picture is different to yours but the concept stays the same. The port numbered 4 cannot be used for a connection to a network device as it will be used to connect your modem to the router and covert the telephone line data into Ethernet.
Now your network is all set up and connected. You should see the internet logo on the front of the router now turn to a solid green colour. If you are using WiFi connection you will need to search for network devices and find your routers SSID. This information can bee seen on the back of the router along side the password you will need to enter to connect.

If you are using a cabled connection then you are good to go, providing your IP address information on your PC/Laptop is set to Dynamic. If you have your own IP range (static IP), you will need to adjust this information to match the routers IP address 192.168.1.1