Sequential Ring
Sequential Ring
Description
Ring multiple phones sequentially when calls are received
Function
Sequential Ring allows you to sequentially ring up to 5 locations in addition to the base location for a specified number of rings.
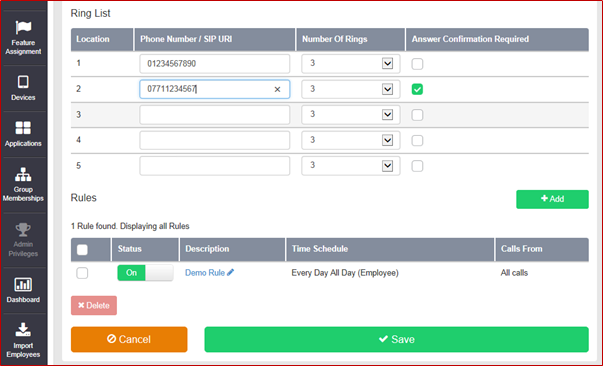
The 5 locations can be either a phone number or a SIP-URI. The feature applies to calls matching your pre-defined criteria. Use this service to ring calls from your manager, a family member, or an important customer on your mobile phone, alternate business phone, or home phone.
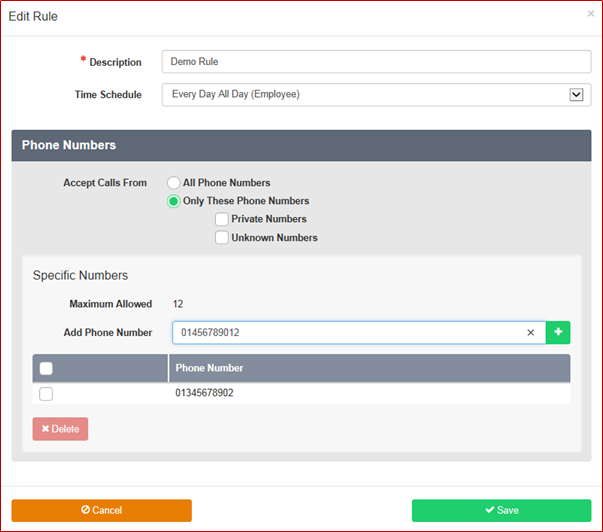
The criteria for each Sequential Ring entry can be a list of up to 12 phone numbers or digit patterns, a specified time schedule, and a specified holiday schedule. All criteria for an entry must be satisfied for the call to enter Sequential Ring (phone number and day of week and time of day). If the criteria do not match, the call continues as if this service was not turned on.
Configuration/Operation
In the Business Portal navigate to:
- Employee > Features > Mobility > Sequential Ring
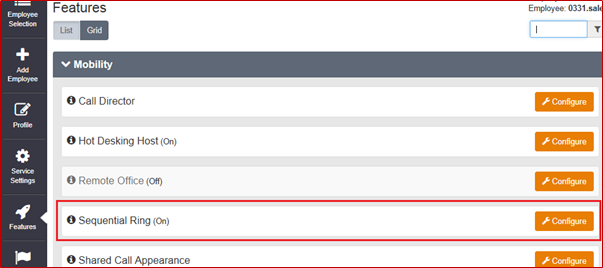
- Select Configure
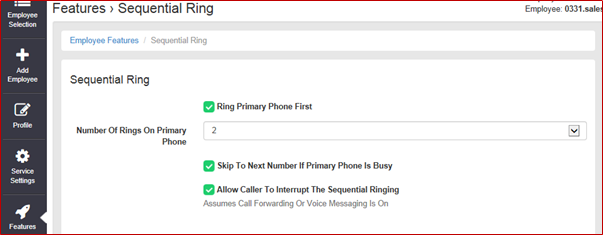
- Setup the sequential list of phone numbers
- The Number of rings at each location
- Select is Answer Confirmation is required.
- Refer to the Answer Confirmation feature section in this guide.
- Add a rule or edit an existing rule
- Sequential Ring cannot be activated without a rule being defined. It could be as simple as All Calls, All Day Every Day.
- Every Rule must have a unique Description
- Select a Time schedule from the dropdown menu.
- Note:- Time schedules have to be pre-configured (Please refer to the Site Features Guide for more details)
- If Rule is to cover ‘All Calls’ select the ‘All Phone Numbers’ radio button and click ‘Save’
- If Rule is for specific phone numbers select the ‘Only These Phone Numbers’ and add the phone numbers (max of 12)
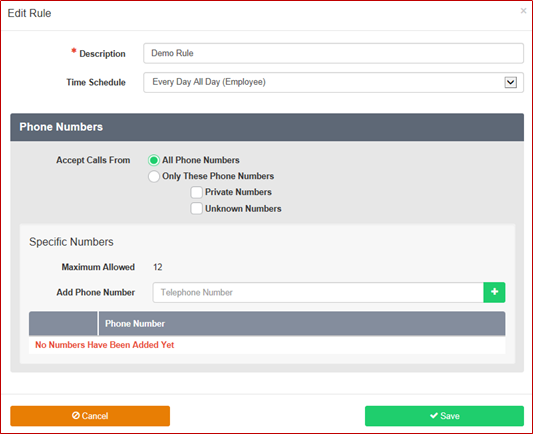
- To add a phone number type the number into the box and click the ‘+’ button

- To delete a number select the right hand tick box and click delete
- To delete all numbers select the right hand tick box in the header bar and click delete.
- When you have completed the configuration Click ‘Save’